I distinctly remember my implant introduction in dental school. It was a cluster of screws and parts and god knows what. It was complicated. It was patients getting draped from head to toe. It was complex surgery to replace a tooth.
No damn wonder I told myself I would never do that.
In 2008 I was introduced to digital implantology. From that moment I could easily see where it was going. More importantly, I saw exactly how it would benefit my practice and my patients.
Many think of digital implantology as just using imaging to see the bone. Many think of digital implantology as using a guide to place the implant. Some have even told me that it is ‘cheating’ to use a guide.
Digital implantology is way beyond just the guide. The virtual plan is the first step. The surgical guide is the second step. The digital restoration is the final step.
The real magic comes when you put everything together and minimize trauma, patient visits, and deliver a high level of care.
My biggest frustration that I face as an educator, advocate, and consultant of digital implantology is making people understand the value of training and taking it to another level. I want to shake people sometimes when I hear them say they don’t need training.
We recently finished a case that perfectly outlines the tangible benefits of digital implantology and training that gets you there.
Peggy came to our office for a second opinion. She had recurrent decay underneath an existing crown and was in need of an implant. She visited a ‘specialist’ and was told that she needed the tooth taken out, a bone graft, healing time, implant placement, integration time, and then restoration. A process that would take around 12 months.
Peggy wanted a different solution. Luckily, Peggy ran into my hygienist at a social function and talked to her about it. My hygienist suggested that she come to us for a second opinion and praised our technology that allowed us to do ‘amazing’ things.
Visit 1.
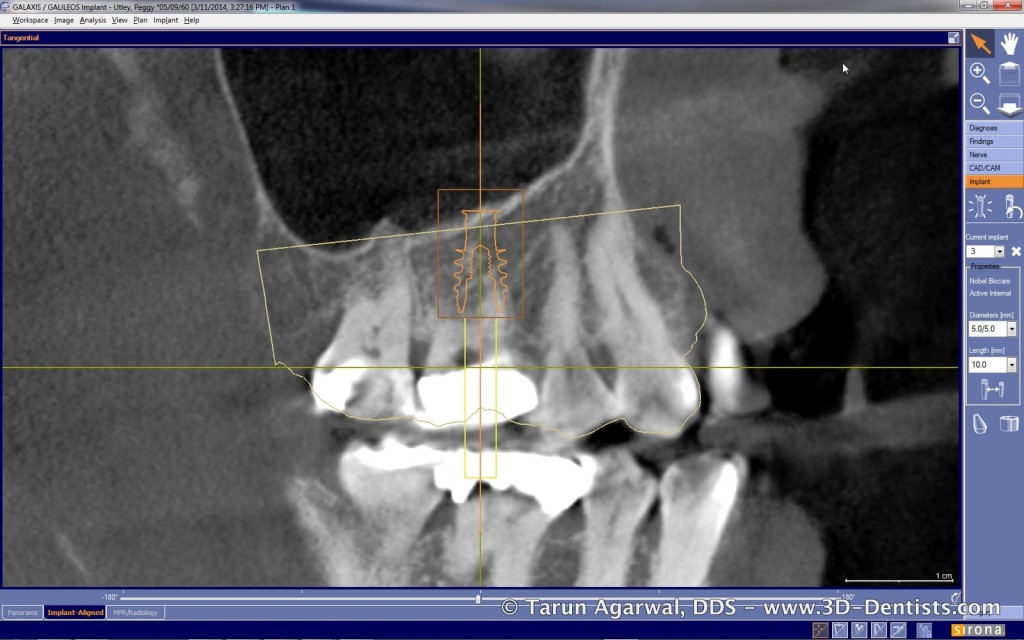
We take a 3D image of the area and share with the patient exactly how we can place an implant the day we remove the tooth.
On a side note…. if you aren’t using an ‘active’ implant, you are missing out on making immediate implants much more predictable.


We gain permission to go ahead and take a digital impression so we have everything we need to move forward with treatment ‘when’ (not if) she is ready. This is all about saving her a visit.

She leaves that visit with a plan in hand, financial options, and we have everything we need so that visit 2 is tooth removal and implant placement.
Peggy decides to move forward. I order a digital surgical guide. Why do I insist on using a surgical guide? It will put the implant in the exact right spot. The drill will not want to deviate and remove the precious bone I need for stability. The implant will be driven to the exact spot needed for ideal restoration and stability. It will not be tempted to deviate from the right path. Immediate molars have a finite path to be correct.

Visit 2.
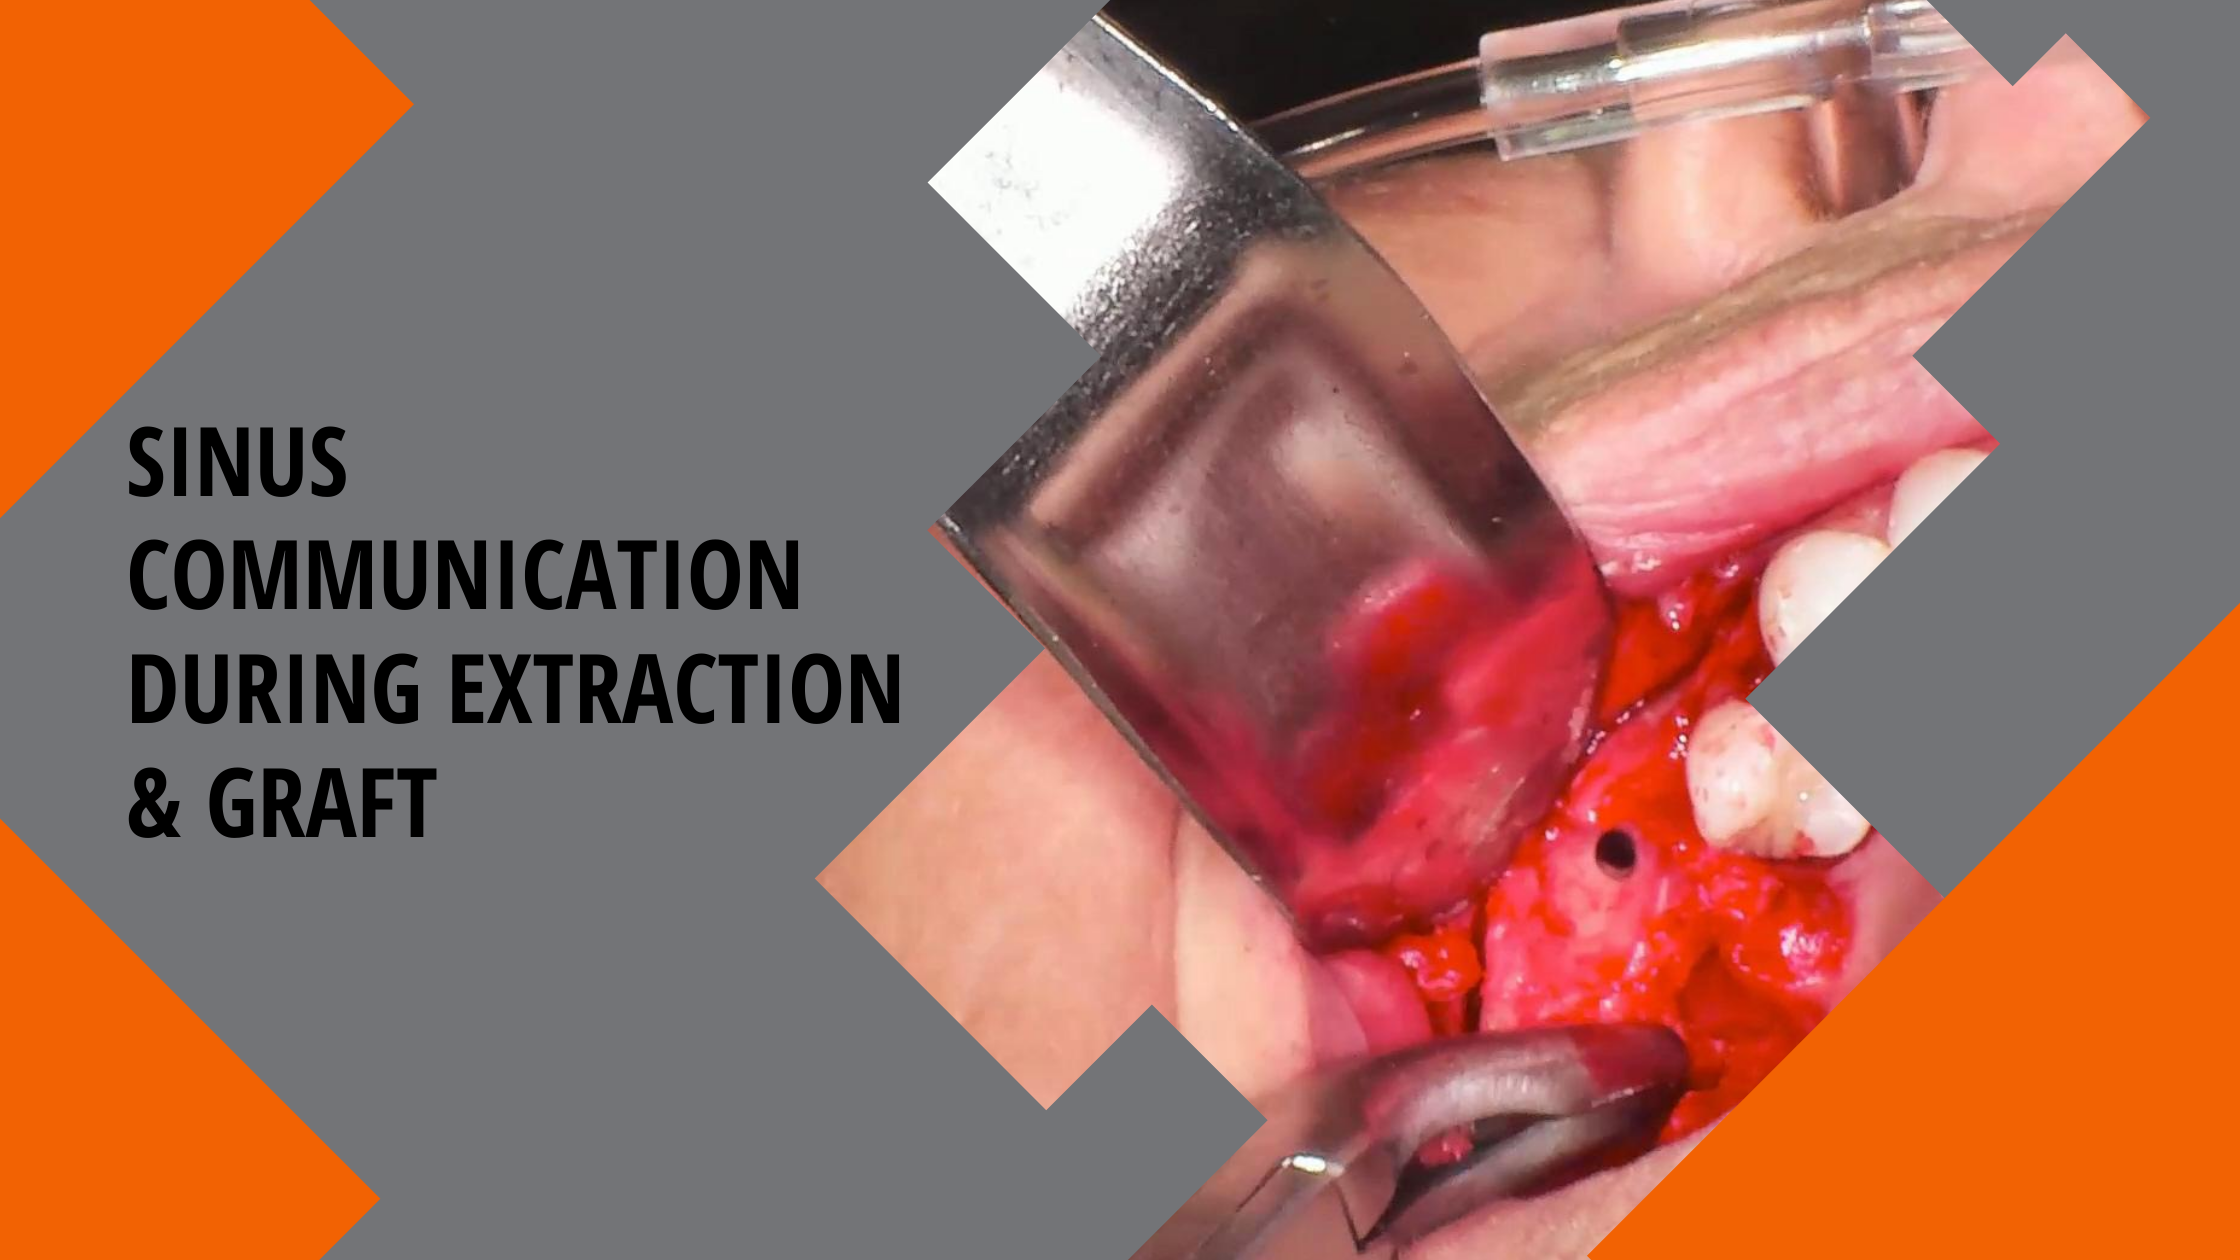
Peggy arrives for implant treatment. She has opted to be comfortable using oral sedation. We utilize atraumatic techniques and preserve the buccal/lingual plates and the interseptal bone.


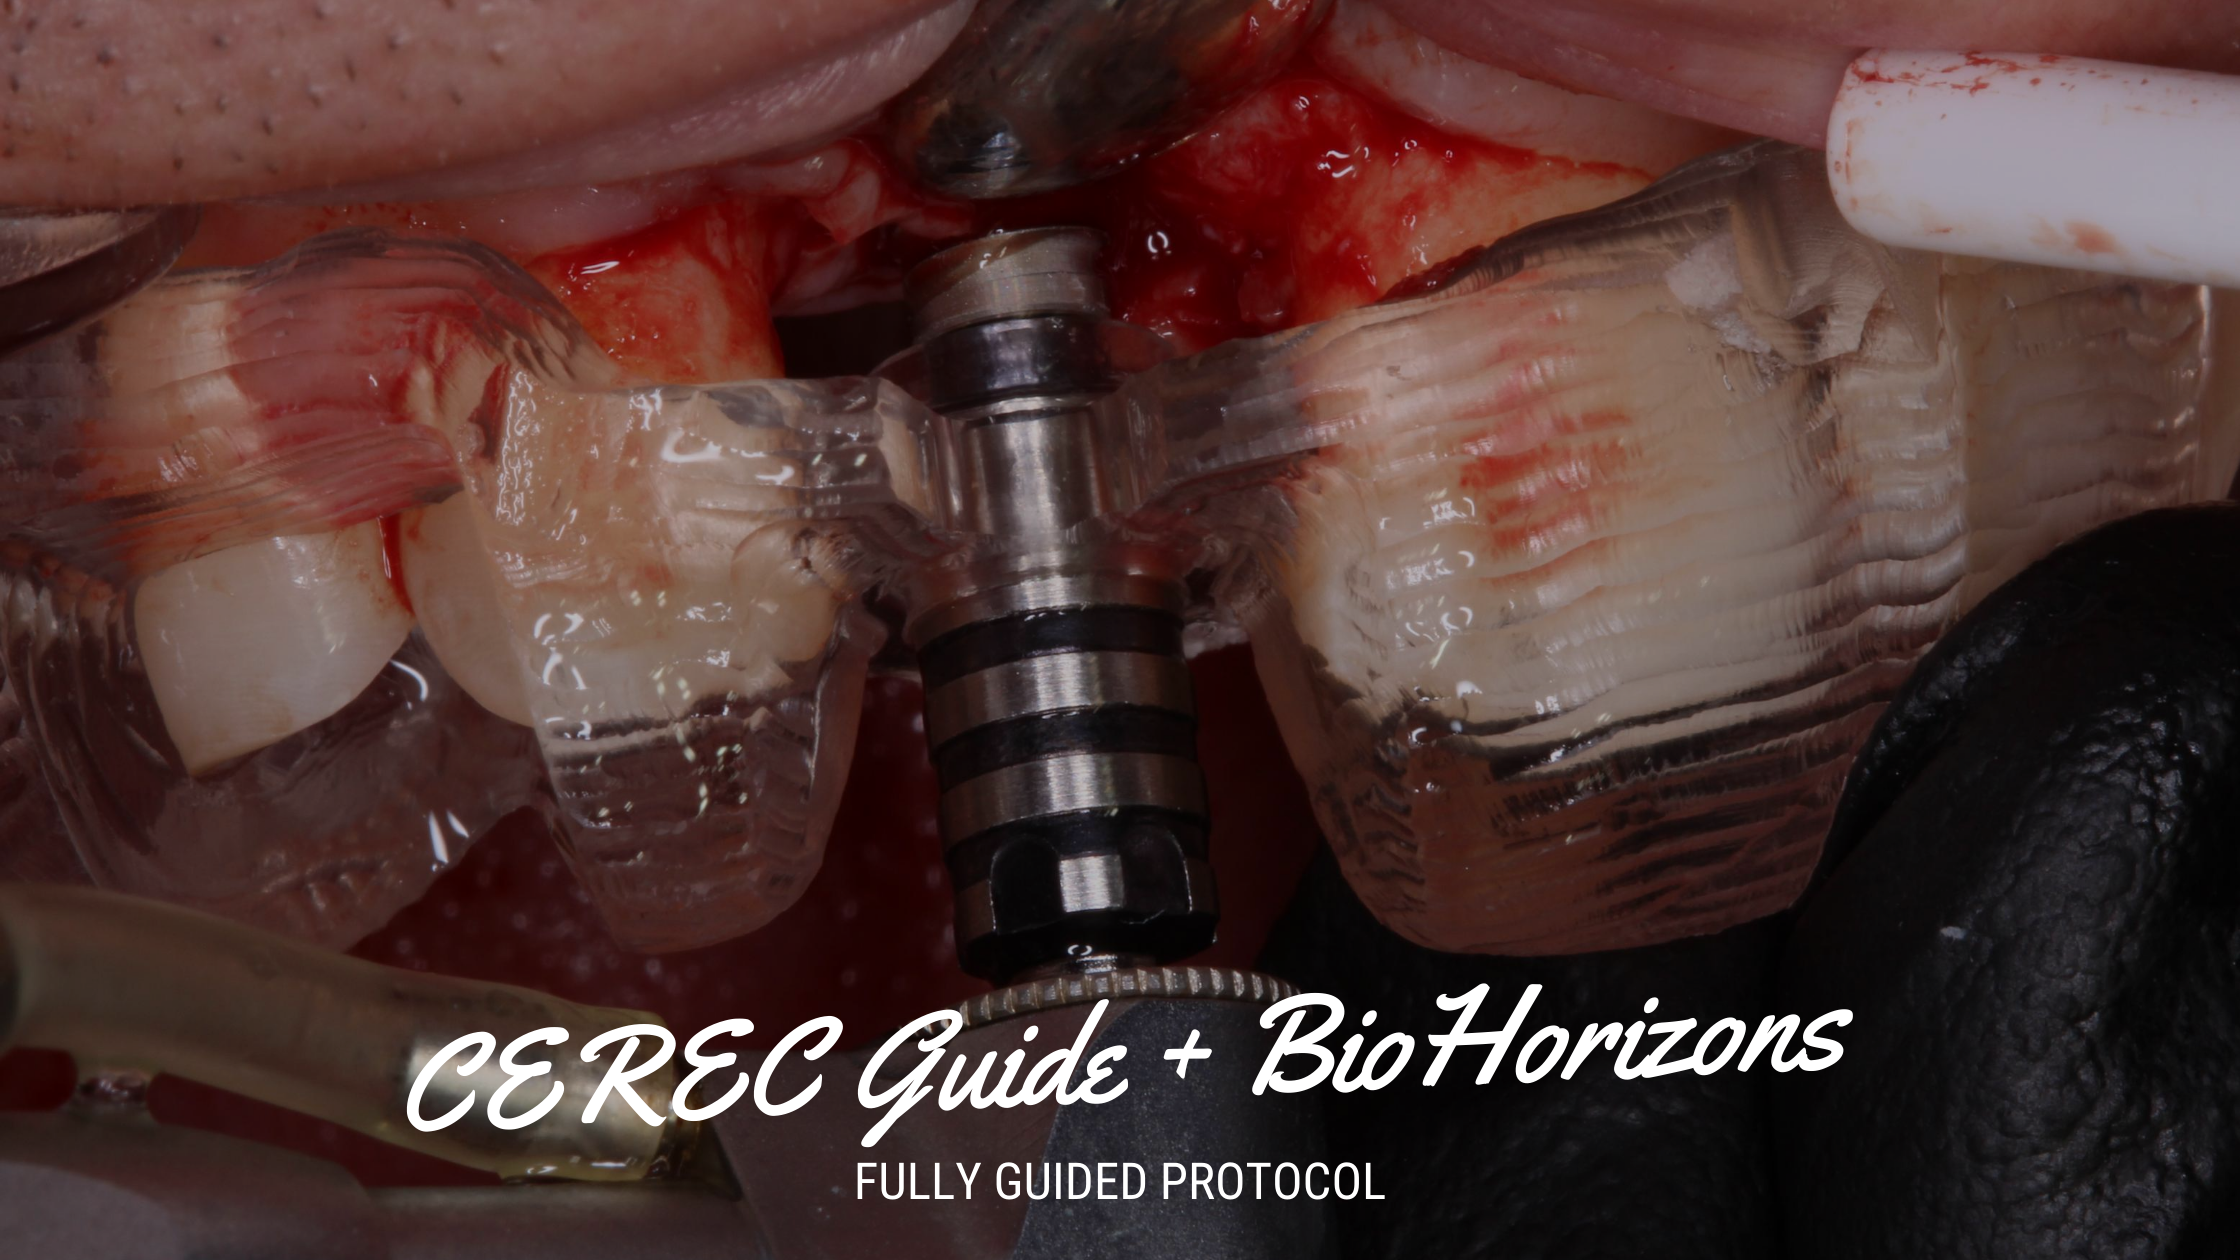
We utilize our guide to drill our osteotomy. Maxillary posterior bone is soft bone and as such can be undersized when using an ‘active’ implant. The undersizing preserves bone and the ‘active’ implant ensures stability.


Bone particulate is placed in the empty sockets and osteotomy. The implant is then driven into position utilizing the guide.


Now here’s the important part…. we go ahead and take our digital implant level impression at the time of placement! This will allow us to have her final custom restoration pre-fabricated for her final visit.


A cover screw is placed and the site is closed with a collagen plug/membrane.


Visit 3.
Approximately 4 months later Peggy returns for her final visit. Her custom implant restoration is already fabricated and ready for delivery.

We give crestal anesthesia and make a small incision to uncover the implant. We could also do a tissue punch utilizing the surgical guide. The cover screw is removed and the custom restoration is placed.
Minor adjustments to contacts and occlusion are made. Patient is out of the chair in about 30 minutes.


Hopefully you are seeing the clinical benefits and biological benefits of such a system. The precision is there! The technology is here! The patients are there!
ARE YOU THERE?
Peggy left that day saying that this took 4 months from start to finish when another person said it would take nearly 12 months. She also mentioned that this was less expensive and less invasive than what she was led to believe implant dentistry would take.
The final result is a happy patient, a happy dentist, and a happy practice. Most importantly, another patient that will sing the praises of modern implant dentistry and our office.